
Mastering the Art of Braids: Simple Styles Anyone Can Do
Have you ever wanted to create those beautiful braided hairstyles you see all around? The truth is, anyone can learn to braid. Braiding your hair is a fun way to get creative and it’s also really useful for everyday life. Whether you want an easy look for school or work, or something fancier for a night out, braids can do it all. In this guide, you’ll learn all the basic steps and simple tricks that will help you make great braids at home-even if you’ve never tried before.
From the well-known three-strand braid to the eye-catching fishtail, picking up a few braiding basics lets you style your own hair quickly and easily. Let’s get started and find out how you can braid like a pro with just a little practice.
Why Braids Are a Great Choice for Easy, Stylish Hair
What Are the Benefits of Braiding?
Keeps hair in place: Braids are perfect for keeping your hair out of your face during sports, work, or any active day.
Helps prevent damage: They cut down on tangles and protect your hair from wind and rubbing.
Shows off your style: Braids can be simple or bold, casual or dressy-whatever you want!
Easy waves without heat: Sleep with braids in, and you’ll wake up to soft, natural waves the next morning.
Are Braids Good for Every Hair Type?
Yes! Almost anyone can wear braids. Whether your hair is straight, curly, thick, thin, long, or short, there’s a braiding style for you. Some hair types just need a little extra product to help hold the braid or control frizz:
Fine or silky hair: Use a bit of dry shampoo or styling mousse for texture so braids don’t slide out.
Thick or layered hair: Lightly mist with water or use leave-in conditioner to make styling easier and reduce flyaways.
The main thing is to know what works best for your own hair and adjust your prep and products as needed.

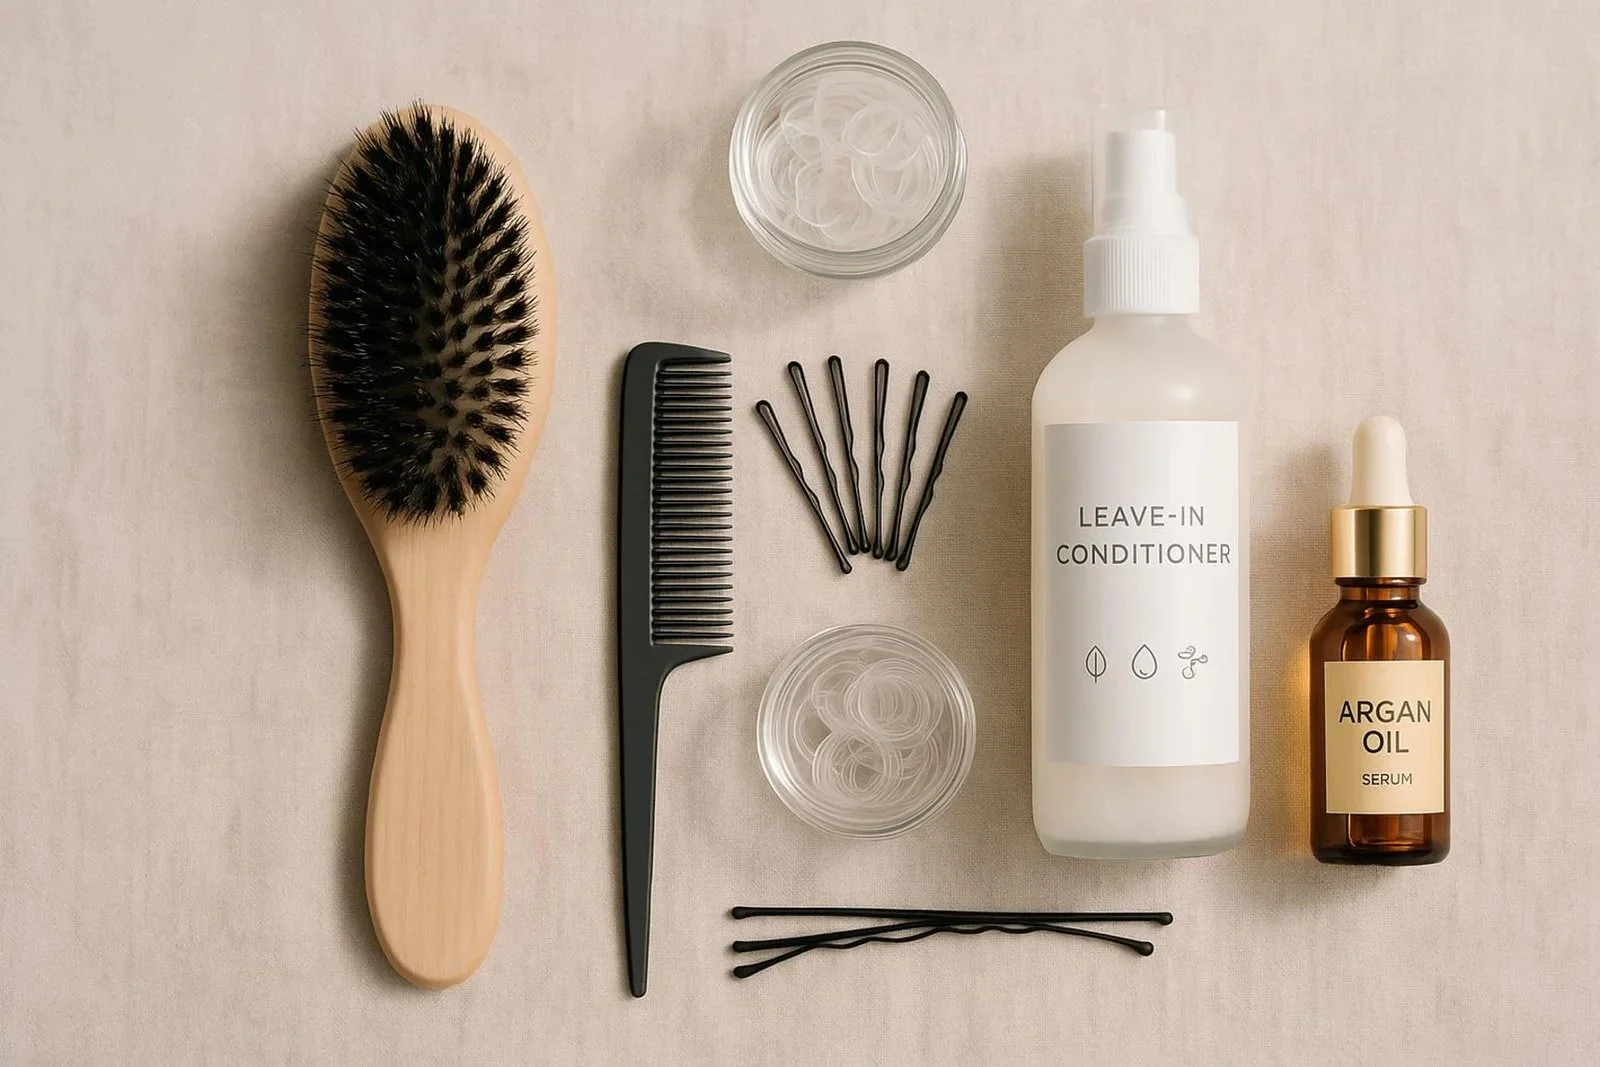
Getting Ready: What You Need Before You Start Braiding
Tools and Products That Make Braiding Easier
| Tool/Product | What It’s For |
|---|---|
| Brush (natural bristles best) | Smoothing and spreading hair’s natural oils |
| Fine-tooth or tail comb | Creating straight sections and parts |
| Hair elastics (snag-free) | Securing your finished braid |
| Bobby pins/clips | Holding back sections while you work |
| Leave-in conditioner | Detangling and adding softness |
| Light hair oil or serum | Controlling frizz, adding a bit of shine |
| Dry shampoo | Giving hair texture and freshness, especially if not just washed |
How to Prepare Your Hair for Braiding
Good prep makes a huge difference for neat, smooth braids:
Detangle carefully. Start from the ends and gently work upward with a wide-tooth comb.
Don’t braid freshly clean hair. Hair that’s washed the day before or has a little product often holds better.
Decide on your part (middle, side, pigtails, etc.) and use your comb to make it as straight as possible.
Basic Braid Styles Everyone Can Try
1. Three-Strand Braid: The Essential Starter
This is the simple braid everyone should know. It’s the base for many other styles and works for all hair types.
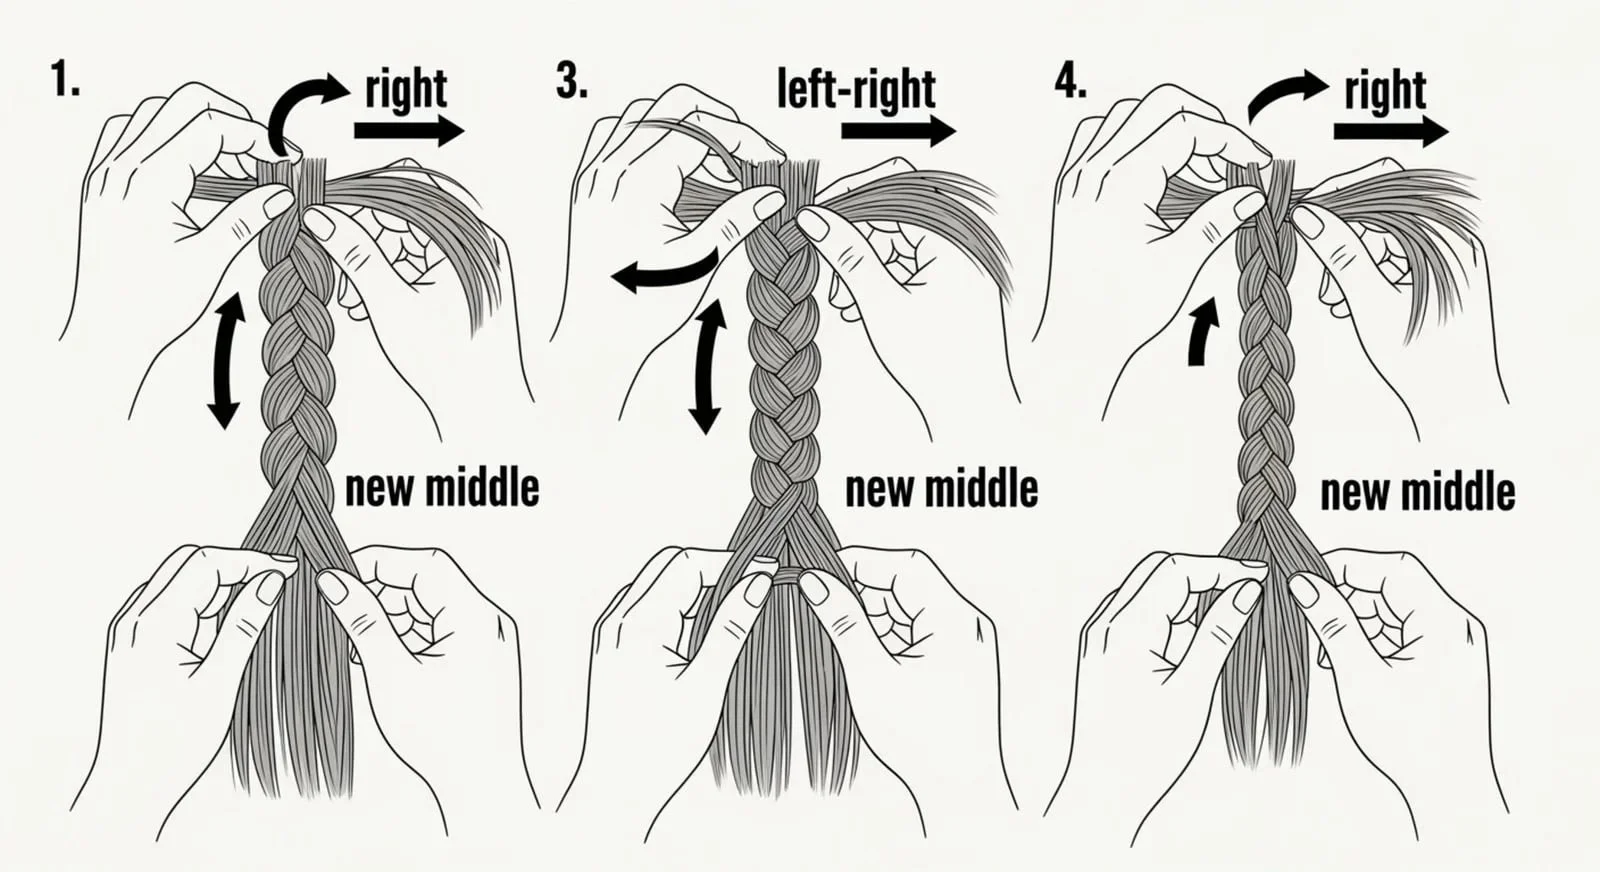
How to Do a Three-Strand Braid
Gather the hair you want to braid-a ponytail, pigtail, or just a small section.
Split it into three even parts: left, middle, right.
Take the right section and cross it over the middle. That’s your new middle piece.
Then cross the left section over the new middle section. Repeat: right over middle, left over middle, until you reach the end.
Secure with a hair elastic. To make your braid look thicker, gently pull on each section to loosen it up (“pancake” it).
2. French Braid: Adds Body and Style
The French braid creates a smooth, woven look and starts at the top of your head. It looks tricky, but with practice, it gets easy.
How to Make a Simple French Braid
Take a small section of hair near your forehead and split it into three.
Do one or two stitches of a normal three-strand braid.
Each time you’re about to cross a side section over the middle, add a small piece of hair from that side to it before you cross.
Keep adding hair and crossing over until you reach your neck-then finish with a regular three-strand braid and tie off.
This braid keeps hair in place all day and looks tidy.
3. Dutch Braid: The “Pop-Out” Braid
The Dutch braid stands out on top of your hair for a bold look. It’s a French braid in reverse-cross under instead of over.
Steps for a Dutch Braid
Take a section at your crown and split it into three.
Take the right section under the middle, then the left under the middle.
Each time, add a bit of loose hair to the section before crossing under.
Once you’ve added all your hair, finish with a regular three-strand braid (crossing under). Tie the end and optionally fluff for more volume.
4. Fishtail Braid: Looks Fancy but Is Easy
The fishtail braid looks detailed but only involves two pieces instead of three.
How to Make a Fishtail Braid
Split your hair into two even sections.
Take a small piece from the outside of the right section and add it to the left section.
Now take a small piece from the outside of the left section and add it to the right section.
Repeat this process all the way down, always working from the outside.
Secure with an elastic and gently pull the edges if you like a softer look.
How to Make Your Braid Look Neat and Last Longer
Tips for Clean, Tidy Braids
Always start with smooth, brushed hair.
Add mousse or dry shampoo for grip-especially on fine hair.
Keep the same tightness as you braid for even results.
Use a tail comb for sharp parts and sections.
How to Fix Frizz and Keep Braids Together
Use a little leave-in conditioner or serum on your hair to smooth down frizz before braiding.
Finish with a light spray of hairspray to keep flyaways in check.
For overnight braids, sleep on a silk or satin pillowcase, or in a silk scarf, to avoid friction and tangles.
If any pieces pop out, pat them down with a bit more product or a tiny amount of styling paste.
Mix and Match: Making Unique Styles by Combining Braids
How to Combine Different Braids
Once you know the basics, you can blend braids for fun new looks. Here are some ideas:
Start with a French braid at the top, switch to a fishtail at the neck for a mix of textures.
Use small three-strand braids as accents around the head, then gather them into a ponytail or bun.
Make two side French braids, then twist them together into one braid or a messy bun.
Mixing styles is a simple way to personalize your look.

Best Braids to Pair for Special Events
Waterfall braid + loose hair: This braid lets pieces of hair drop down and looks beautiful for parties or weddings, especially with waves or curled hair.
Dutch braids: Two Dutch braids can be worn as pigtails or pinned up into a braided updo-add pins or flowers for extra flair.
Accessories: Add ribbons, gems, or fresh flowers to make your braids stand out even more.
How to Care for Your Hair While Wearing Braids
Tips to Keep Hair Healthy While Braiding
Don’t braid too tightly-this can pull on your scalp and cause breakage or even hair loss over time.
Keep your hair moisturized. Use leave-in conditioner or a little argan oil, especially on the ends.
Give your hair breaks. Don’t keep braids in for too many days at once-let your hair and scalp rest and wash regularly.
Trim your ends every couple of months to keep your hair strong and free from split ends.
Should You Avoid Tight Braids?
Yes! If a braid feels painful, it’s too tight. This can cause headaches and serious damage if done often-especially at the hairline. Always make sure your braids feel secure, but not painful. Loose and comfortable is best.
Common Beginner Braiding Problems and Easy Fixes
What if Your Braid Sections Are Uneven?
If your braid is messy or uneven, likely your starting sections weren’t the same size. Use a comb (or your finger) and take time to divide your hair evenly before you start. If you mess up, just take it out and try again-practice makes perfect.
How to Keep Braids from Slipping Out
Braid on hair that’s not freshly washed for better grip.
Use dry shampoo or mousse if your hair is very smooth.
Backcomb (tease) the roots a little before you start if hair is really slippery.
Keep your braid tight as you work, but not uncomfortable.
Secure the end with several loops of a good hair elastic and finish with hairspray for hold.
FAQs About Simple Braid Styles
Can Braids Damage Hair?
Braids are good for protecting hair, but only if done right. Tight braids, rough hair ties, or leaving braids in for too long without washing or care can cause breakage or hair loss. Always use gentle elastics, don’t pull too hard, and moisturize your hair between braids.
How Long Do Simple Braids Last?
It depends on your hair type, the braid, and how you style it. A simple braid might last a whole day, while tighter or double braids can look neat for up to two days. For everyday braids, it’s usually best to take them out at night and redo in the morning. Boxer braids or tighter Dutch braids can last longer, especially with care.
Building Your Braiding Skills and Confidence
The More You Practice, the Easier It Gets
Braiding gets easier with time. At first, your braids might be messy and your arms might get tired. That’s normal! With regular practice, your hands will learn what to do, and you’ll get quicker and more accurate. Start with basic styles, then try more complicated ones. If you find it hard to braid your own hair, try first on a friend or a wig stand. Set aside a little time each week to practice-even 10 minutes a day makes a difference. Soon enough, you’ll be able to braid quickly and neatly, and come up with your own creative styles.
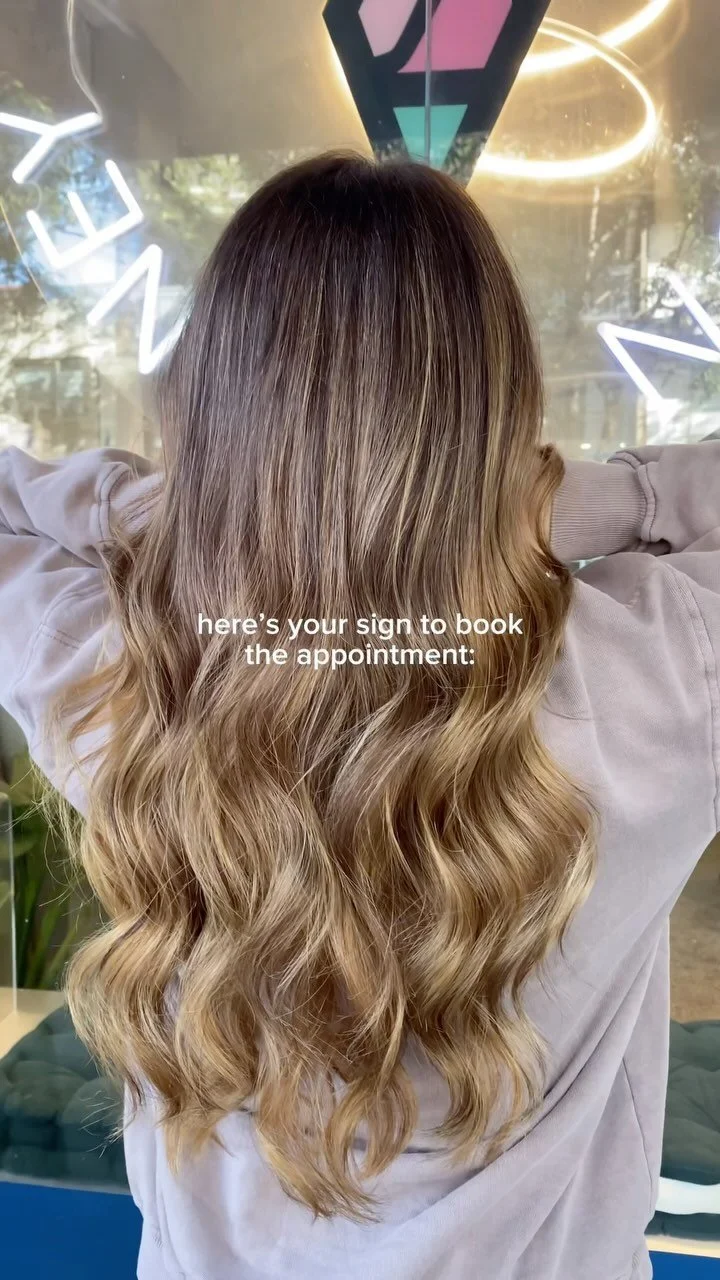
Do you live in Sydney?
Get the perfect look at our salon – schedule your appointment now!
Our Services
Check Out Our Instagram


Check out our instagram
Check out our instagram and see our latest posts!
Check out our facebook
Check out our facebook and see our latest
posts!